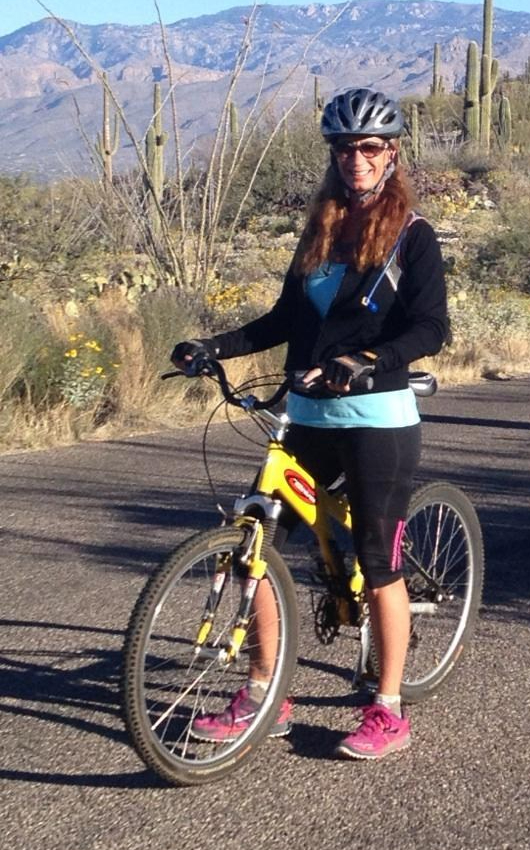
Riding a bike is great cross training for hiking
Well there is more to it than that: Being healthy and fit for a day hike is significantly different than being healthy and fit for a thru hike. Our body and minds need to be ready for the trail. Not to mention the detailed planning that goes into a thru hike adventure which we will discuss in another blog. But the training can start NOW! “The better the train, more the gain on the trail” ……says not just me. The idea of a week-long to a month long thru hike is romantic in my mind given that I will be out in the beautiful-middle-of-no-where-wilderness with all I’II need to survive on my back dependent on only myself-awe!!! That’s pure love. I don’t mean that selfishly I mean it supportively to the idea that self-reliance, self-confidence, basic survival skills and gaining the ambitious belief “I CAN DO IT!” is my means of attack for the encompassing objective in preparing and planning a thru hike. So, with members of my tribe we are working to increase our stamina, endurance, core strength and our confidence to be as successful as possible on our future journey on a section of the PCT (Pacific Crest Trail) from Yosemite to Tahoe where will make memories that last a life time.
The tribe members joining this journey in July 2018 will be Gwen, myself, Gina, Katie and Brenda. My goal has been to hike the entire length of the Sierra-Nevada’s after completing the JMT (John Muir Trail) with Gwen in 2016. The JMT was Gwen’s pick; this section of the PCT is mine (we take turns picking our adventures). Gina and I hiked Guatemala together summer of 2017 and she fell in love with that part of the trip craving more adventures. Katie wants more time on the trail after her introduction of 2 days on the JMT (read: Gwen’s “Ignorance is bliss” blog). And Brenda is new to hiking and backpacking but very eager with several weekends and overnights under her belt. Gwen, Gina and I will start in Yosemite with Katie and Brenda joining use a week later at Sonora Pass to finish the second half of the 152-mile section ending in Meeks Bay. This is all very exciting to think about but physically challenging to complete.
I have made additional summer commitments beyond the 152-mile hike following the weekend after our completion. They include but aren’t limited to hiking with my son, Cole, from Yosemite Valley to Tuolumne Meadows including hiking Half Dome, and then the next week we are off to Alaska for salmon fishing and finishing with a half marathon in Anchorage. So, training can’t start soon enough for me. No one needs similar goals to find self-motivation to improve personnel fitness. Where ever you are and whatever your objectives are you can implement a training program to fit your needs or follow the one below. It is a simple comprehensive muscle building, core strengthening, endurance increasing workout plan. Take what you need and go for it!
Note: The section of the PCT we are doing has no elevation gains greater than 4000 feet. There are summits that will be challenging with our back packs weighing between 32-45 pounds.
Remember building all we need within us is a process over time….and we are what we eat. Eating healthy and drinking lots of water is important. Always have fun and respect your limits. Avoid injury by NOT doing too much too fast…. start somewhere but start slow if just beginning to train. A day of rest can do your body and mind wonders. To work out with tribe members is beneficial, motivational and keeps you accountable.
Training for a thru hike:
“The difference between a dream and a goal of a thru-hike: An action plan in place to gain momentum for the changes your body will need to achieve your dream while gaining the confidence you need to follow through.” -BK
HINT: Make a commitment to the days per week for training and stick to it
Cardio and endurance is essential
-hiking steep and difficult trails for a minimum of 2 hours once a week (increase distance and time bi-weekly-gradually)
-challenging quick-paced cardio workout (running, treadmill, biking or stairs) with incline increasing over time for 1 hour a day
-engage in fitness class as an alternative for a shake-up to muscles 1 hour a week (swimming, abs of steel tape, Les Mils at a gym or boxing)
Core strength is imperative
-weight train 3 times weekly for a minimum of ½ and increase weight over time (do 2 to 3 sets of 15 repetitions of each exercise working arms, legs and core)
-yoga, TRK, good old calisthenics or swimming improves core strength (calisthenics: jumping jacks, wall sits, push up, abdominal crunches, chair set-ups, squats, side lunges, squat jacks, high knee shuffle, ski umps, chair tri-cep dips, plank, high knee running in place and mountain climbers to name a few that can be done in circuit form and done twice with 30 second rest between 1 minute of 13 exercises)
– stretching after a good hike or work out is the best time to stretch because you are warmed with blood flowing through your muscles. Basic stretching after each workout will decrease soreness and increase your range of motion
– Varying exercises with increase of time, incline, distance and weight improves stamina and overall benefits of training
Our tribe starts TODAY! We are starting with the stairs at McKale Center (@ U of Arizona their basketball stadium). We will run up and then down all of stairs for an hour -around and around we will go. We are trying to exercise be it hiking, walking, running or swimming 5 days a week with a long hike at least once a week. This Sunday we are doing Blackett’s in Sabino Canyon National Park which is a total of 8-miles, but the last leg of it is up 1.7 miles with a 1700-foot elevation gain. Tucson tends to have awesome winter weather making outdoor training easy and a multitude of diverse types of hiking trails to choose from. And the stadium stairs for not-so-good weather days. We will start adding weight to our backpacks and do a few shake-out overnights that will prepare our bodies to carry the weight of our packs on the 14-day journey.
Start today……. stick with it! You will only get better!
-Kat
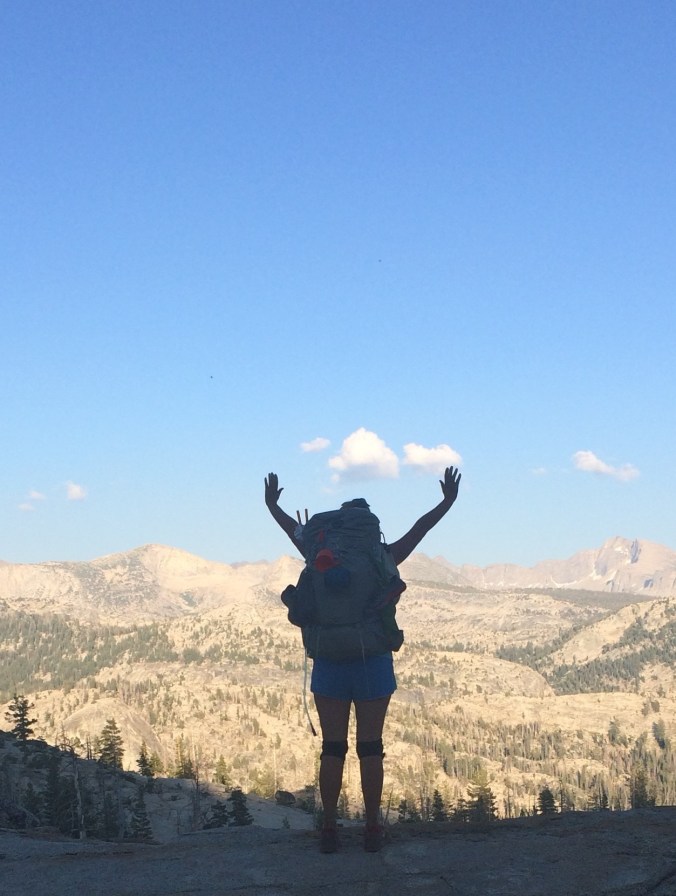
Looking in the direction I am headed… believing I CAN DO IT!
